Chris's Great Western Paddlewheel Engine

Started by crueby · 231 replies · 10,579 views

crueby
Reply #15 · 28 Sept 2026, 19:46
Quote from: KimVery cool start to another very interesting engine, Chris!  Love the gothic look. And using CNC for them has got to be a fun change too.  :popcorn: :ThumbsUp: :popcorn:

While it isn't your usual (nor mine), I would think it is fun to try out some new techniques like CNC. And this is an excellent candidate! Different issues, different considerations, more fun things to learn! :)

Kim
Definitely different, in a lot of ways. At least I've been using CAD for a lot of years so I didn't have to learn that end of it. My machine, a Carbide 3D Nomad-3, is not capable of using larger bits on metal, its fine for small cutters though its slow to hog out big volumes. Definitely not going to be my main tool for engine building, kinda boring compared to turning the cranks myself, but for parts like this its perfect. The options for generating the toolpath files are quite numerous, many are geared towards big commercial machines and very complex to learn. I'm using the app that Carbide-3D supplies, it does the job and is tailored to this machine. Fusion 360 can do it too, but I have not been able to figure out their workflow for the CAM side of things well enough and gave up and went back to using the Carbide-3D app again.
crueby
Reply #17 · 29 Sept 2026, 15:32
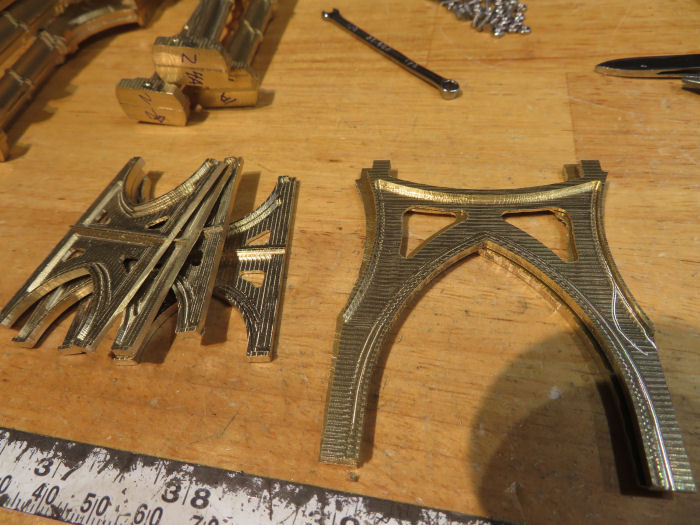
Yesterday the CNC goat finished nibbling out the last of the gothic frame parts, the crosswise plates that sit between the frame panels. Still need to get the holes drilled to fix them to the main panels. Here they are before riveting the halves together:

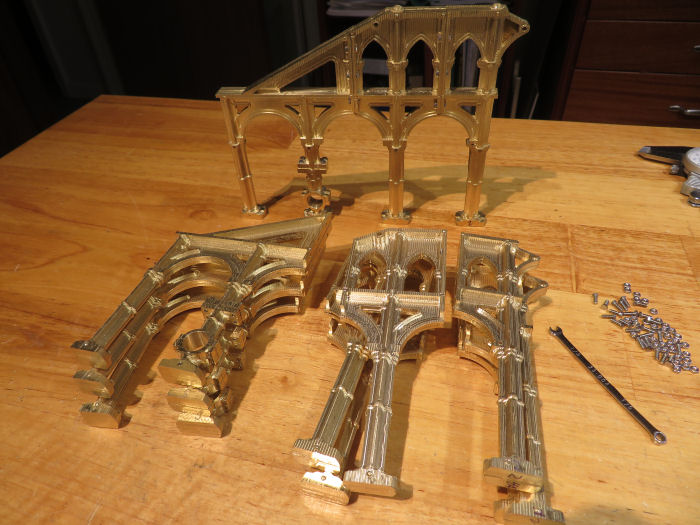
and started bolting all the frame panel sections together to make the full panel sections. LOTS of small screws and nuts:

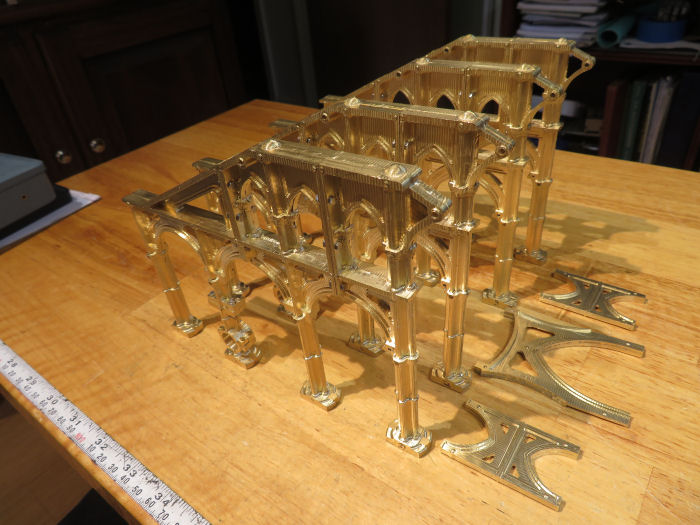
And here are the panels all together, ready to drill for the holes to fix them to the crosswise panels, and also drill the holes in the bases to fix them to the condenser tanks. Last holes will be on top to add the crankshaft bearing blocks.

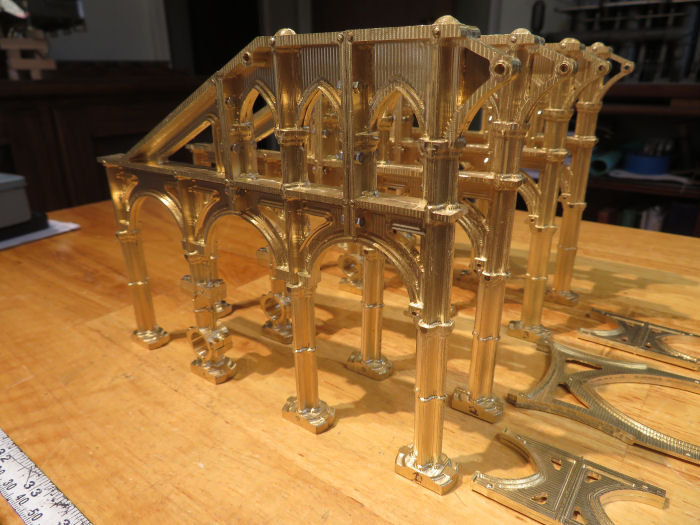
another view

So, from here out all the machining will be done on my manual Sherline's, no more CNC on this model.  :cartwheel:
cnr6400
Reply #19 · 29 Sept 2026, 15:53
:ThumbsUp: :ThumbsUp: :ThumbsUp: :popcorn: :popcorn: :popcorn: The frames look excellent Chris. Hope the shop elves can cope with the 3.2 cubic acres of goat exhaust   brass swarf!  :Lol:
crueby
Reply #22 · 29 Sept 2026, 17:12
Thanks guys! Pleased with the progress so far (after about a week of watching the mill nibble all the parts) and a day or so of actual assembly. Now getting into the fun part.
Roger B
Reply #23 · 29 Sept 2026, 18:29
An excellent start to your new project  :ThumbsUp:  :ThumbsUp:  :wine1:

How were the patterns for the original castings made? Lots of craftsmen with specially shaped planes and spokeshaves or wood cutting machines?
crueby
Reply #24 · 29 Sept 2026, 19:50
Quote from: Roger BAn excellent start to your new project  :ThumbsUp: :ThumbsUp: :wine1:

How were the patterns for the original castings made? Lots of craftsmen with specially shaped planes and spokeshaves or wood cutting machines?
I don't know for sure how these guys did it, but as you say the most common way was for them to make the patterns out of wood, a skilled trade in itself. All sorts of specialized planes, chisels, etc, also the arches are not bearing surfaces so they did not have to be as accurate as bearings, just as accurate as workmans pride!

I'd bet the folks at the nearest cathedral would have been upset if they stole chunks of stone arches to use as patterns!  :Lol:
crueby
Reply #26 · 30 Sept 2026, 00:28
Quote from: Rledoux313Off to a great start, this will be a great looking model!

I hope so!  :Lol:

Thanks!  :cheers:
Chipswitheverything
Reply #27 · 30 Sept 2026, 07:55
Fantastic progress on the complicated and characterful frames of the historic engine model!    ( You haven't got a back door in your familiar workshop that secretly opens on to a small factory where all these bits are actually being produced, have you?!)
  In my earlier comment, it was the engines for Paddle Steamer Dee that I was recalling.  My Science Museum booklet about Maudsley mentions that Naysmyth assisted him with the making of this model, and devised a nut milling machine to help produce the many very small nuts and bolts needed.  No sending off for a few packets of fifty 8 BA nuts and bolts back then!  Dave
crueby
Reply #28 · 30 Sept 2026, 11:44
Quote from: ChipswitheverythingFantastic progress on the complicated and characterful frames of the historic engine model!    ( You haven't got a back door in your familiar workshop that secretly opens on to a small factory where all these bits are actually being produced, have you?!)
  In my earlier comment, it was the engines for Paddle Steamer Dee that I was recalling.  My Science Museum booklet about Maudsley mentions that Naysmyth assisted him with the making of this model, and devised a nut milling machine to help produce the many very small nuts and bolts needed.  No sending off for a few packets of fifty 8 BA nuts and bolts back then!  Dave
Great info! I'd love to get to the museum to see all thier models. Someday!
crueby
Reply #29 · 30 Sept 2026, 14:43
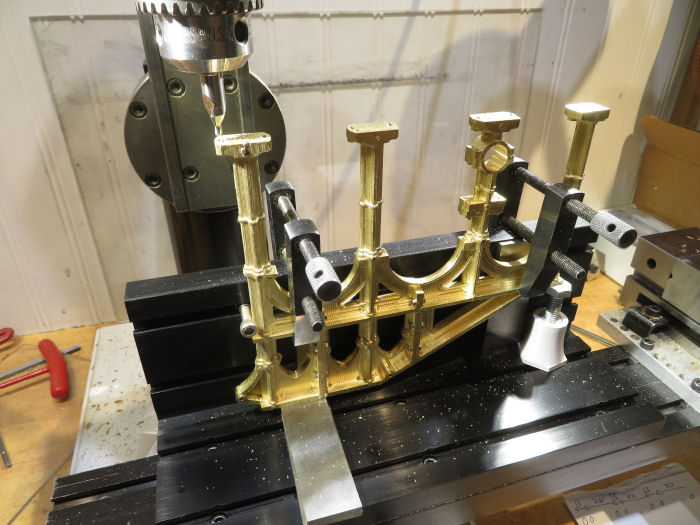
Yesterday the remaining item from my Sherline stock-up order arrived, a right-angle table attachment for the mill. New toy!  :whoohoo:

Perfect timing, it came in handy for clamping the frame panels in place to drill the base pads for mounting holes. I set up an end stop, and used some parallels to clamp against since the flanges are not the highest planes in the panels. Set up the distances on the first one, made notes of hole spacing for later when I make the floor panels, and started drilling...

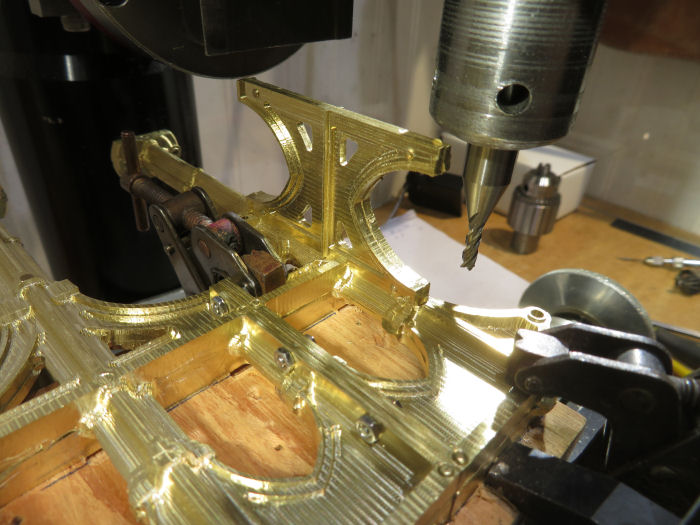
Then set up with a wood block to lay the panels down flat to mill/drill for the rear cross panels. Rather than spacing the panels out with parallels like on the previous step, I just milled some pockets for the higher spots to fit down into. Here is the first slot after milling, and test fitting the cross panel. 5 more slots to go, then I can get the holes drilled/tapped to hold them all together. After that, will make the round crossbars that go between the panels in a few places.

Quick reply

Log in to reply.