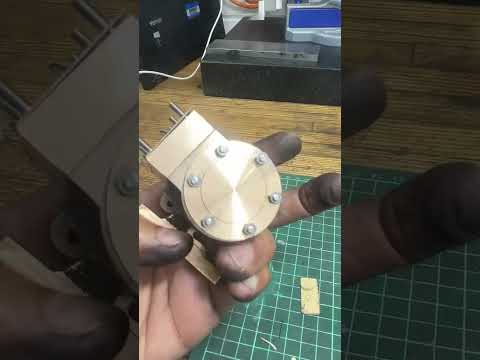
Southworth rotative pump

Started by redhouseluv · 145 replies · 5,725 views

redhouseluv
Reply #30 · 8 Oct 2026, 07:14
Quote from: JasonbYes an O ring goes in the recess hence the quite specific size.


What's the best way to get to that specific size, I can mill it to 0.250", but the other 0.009"? Would it be a mini boring bar in the lathe?
Last edit: 8 Oct 2026, 07:21 by Sanjay F
Jasonb
Reply #31 · 8 Oct 2026, 07:18
Very small boring bar or make a D bit by turning some silver steel down to that diameter, mill to half thickness, add a few degrees clearance to the front end and harden.
redhouseluv
Reply #32 · 8 Oct 2026, 11:43
The valve chest is now complete including the recess for the 'o' ring - look how close the edge of the recess is to the edge of the valve chest, only just inside  ;D
Log in to see this image
redhouseluv
Reply #34 · 8 Oct 2026, 15:22
Hmm, a cylinder cover without a boss to locate into the bore, that’s a new one on me….,

Not sure whether to make a small one or follow the instructions?? Mind you with the bore not centred to the outside maybe visually better to locate it by eye  :thinking:
Log in to see this image
Rledoux313
Reply #35 · 8 Oct 2026, 15:27
Is the casting a perfect cylinder anyway? It’s hard to tell in the photo. I think your idea of a larger head centered in the cylinder may look good from that end, but it might make the piston rod and all of the center bits look skewed.
redhouseluv
Reply #36 · 8 Oct 2026, 15:41
Quote from: Rledoux313Is the casting a perfect cylinder anyway? It’s hard to tell in the photo. I think your idea of a larger head centered in the cylinder may look good from that end, but it might make the piston rod and all of the center bits look skewed.


Ah sorry, I haven't finished machining it yet, just paused for some thinking time; it will be the thickness as in the drawing, but just wondering about how to locate it i.e. either making a boss and into the cylinder or without and locating it so it's visually correct .........option 2 is to my liking atm and follows the drawing  ;D
Jasonb
Reply #37 · 8 Oct 2026, 17:26
But the drawing does show the bore in the ctr of the casting not off to one side :LittleDevil:

Proper job would be a concentric cover and a bit of work to the cylinder to get the outside equal a round the hole.

Also as you have gone for the smaller bore option it might be worth reducing the hole PCD as the screw heads might come a bit close to the edge, say 1.5"
redhouseluv
Reply #38 · 8 Oct 2026, 19:27
Oh I was deep machining and have just read the previous message..............

I went for the my 2nd option and I think it came out ok, visually. Yes you are right I could have reduced the PCD given the bore diameter, but it's now at what's illustrated. I will be using smaller nuts so I think they'll be okay, the current screws are temporary and will be replaced with studs.

I left a 0.005" raised centre section just to make the cover not quite so look boring ;D

So that's the valve chest and the rear cover fitted, next comes the front cover which is a bit more complicated. I have been following the drawing sequence so far and it has been good in terms making parts in the correct sequence
Log in to see this image
Last edit: 8 Oct 2026, 19:38 by Sanjay F
redhouseluv
Reply #39 · 9 Oct 2026, 16:19
I made a start on the front cover casting, the edge surface was very rough so a fair amount of time with various files; it's still not perfect but will clean up some more after the machining.

The bore boss, tie rod and cylinder bolts holes are done, need to make the recess for the gland 'o' ring and the gland flange holes which I'll make later
Log in to see this image
redhouseluv
Reply #40 · 9 Oct 2026, 19:35
I made a little gauge pin to accurately measure the recess for the 'o' ring whilst boring it out on the lathe. The front cover is now complete and can be used as a template for the bolt holes in the cylinder and then onto a final tidy up of the sides ......... all jobs for tomorrow :)
Log in to see this image
Rledoux313
Reply #41 · 10 Oct 2026, 01:58
Nice job, I have to admit I don’t really know all the parts of this pump and how it goes together… but it looks good  :thinking:
redhouseluv
Reply #42 · 10 Oct 2026, 07:15
Quote from: Rledoux313Nice job, I have to admit I don’t really know all the parts of this pump and how it goes together… but it looks good  :thinking:


Usually I have a few pictures of a completed engine/pump, but this time all I have is the drawing and the video at the start of the build. I think this rotative Southworth pump is not as common as their vertical & horizontal Duplex versions which maybe the preference for people who use these pumps in anger?
redhouseluv
Reply #44 · 10 Oct 2026, 14:59
The pump cylinder is puzzling me; another problem in visualising in 3d which is not my strong point. In my marked up diagram I presume:

The 4 blue arrows on drawing A, B, C & D are pointing at the same pair of horizontal holes which traverse from one side all the way through to the other?

The 2 red arrows are water passages presumably and intersect with the vertical holes on drawing but I can't see them? Are they the yellow lines I have drawn and are intersecting at a height mid point of the cylinder, but are behind the cross section AA?

I've drawn them on the workpiece, they look like the arms of a pair of specs, but they will be located halfway down the cylinder bore?  :headscratch:

Any help or some VR glasses which show the piece in 3d (Star Wars/Star Trek style) greatly appreciated!

EDIT

Item 28 in the second drawing are called restrictors ...........why are they not shown on drawing D. I could really do with some photos of a completed one of these if anyone has any or knows where I can find some :help:
Log in to see this image
Last edit: 10 Oct 2026, 15:04 by Sanjay F

Quick reply

Log in to reply.