This was a super fun little project! I can’t say enough about how well Steve’s clock printed and went together. His instructions are just top-notch! Lots of good directions, helpful hints, and discussion of the engineering trade-offs he made. Just incredible!
This thread started with a link to his clock, but I’ll put it here again, just so you don’t have to go back and find it:
https://www.stevesclocks.com/sp17
I started by purchasing the parts I’d need for it. The main thing I didn’t have on hand was 150 3/4" ball bearings. But Amazon quickly came to my rescue here. I'm sorry you are having trouble sourcing these Tom. I was able to get 200 of them for ~$42. That didn't seem too bad to me.
After cleaning them, I set them out to dry. I thought this was pretty neat looking:

Then I set about printing all the parts. This design has some big printed parts! (Oh yeah, I had to buy some filament too

) And then I piled multiple parts onto the print bed and came up with some 20+ hour prints. But it all went well.

After a good week of printing, here’s what I had to show for it. Note that I labeled some of the frame parts because they all look quite similar.

And after assembly, here’s the completed clock. I chose to take pictures in our kitchen/breakfast nook area, and there is a LOT of outside light there. Which is nice most of the time. But it made pictures hard. To see the clock, everything else comes out way overexposed.

This is a little better, taken at a different time of day. Oh, and note my carefully crafted leveling feature?


The big brown wheels are the “ball drops”. Those are the ball wheels that create the power to run the clock. They feed in from the top ball ramp, feed into the top ball wheel, then drop into the next wheel down, and so on till it gets to the bottom. Then the balls pile up on exit ramps on either side of the clock.

Here’s the feed ramp from the top (pardon my finger in the picture – I’m not so good at taking pictures with my phone apparently.)

A close-up of the 3 ball wheels:

And here’s the exit ramp. There’s a ball toggle at the exit ramp. This splits the balls evenly into the left side and the right side.

And here’s the clock face. I printed the hands in black, but now that I see it in person, I think I’ll go back and reprint them in gold filament. I think they’ll be easier to see in that color.

Here are a few videos to show you how things work. It’s a fun clock to watch, though not super active most of the time. It drops one ball every 20 minutes or so. So it takes about 3 balls per hour to keep it running.
This shows the back of the clock when a ball is dropping out of the ball wheel mechanism. The toggle sends it to the right (which looks left because you’re looking at the back of the clock).
https://youtu.be/5vN-qwy_FhI
And here it is on the left side. This one is actually better because you can see the ball before it is released, while it’s still in the wheel’s ball pocket. Also, if you listen, at about 5 seconds in, you hear a big click sound – that’s a ball transferring from one wheel to another, up higher in the ball wheel stack. I accidentally took this video in portrait mode, so now it's permanently a 'short'

Sorry about that.
https://youtube.com/shorts/grMcsQHR_FU?feature=share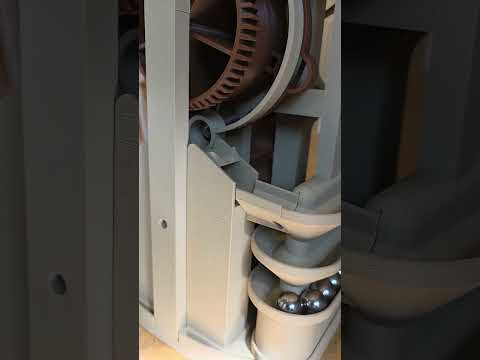
The escape mechanism is a deadbeat escapement. I’d never made one of those before, but this one works quite well. It ran immediately after I assembled the clock! However, it only ran for an hour or so. I took this slow-motion video to help me see what was going on. Turns out the drop was too large onto the right-side pallet. You can see the escape wheel bounce back after it drops onto the right pallet.
https://youtu.be/kyaZNrRNpNg
You need some drop, otherwise, the pallet might hit the tooth of the escape wheel. That’s not a good thing either. But too much drop wastes energy. So, after adjusting that side of the pallet down just a bit, I got rid of the excessive drop, and things run great. It’s been running for a couple of days now.
In this video, you can see the escapement running properly. You can also see the adjustment screws in the last few seconds of the video up in the upper left-hand corner of the screen. It's a very interesting pendulum design with the pallets built into the pendulum. Steve made the pendulum easily removable, which facilitates loading the balls into the ball wheels to start the clock.
https://youtu.be/LIa_EcF9e-4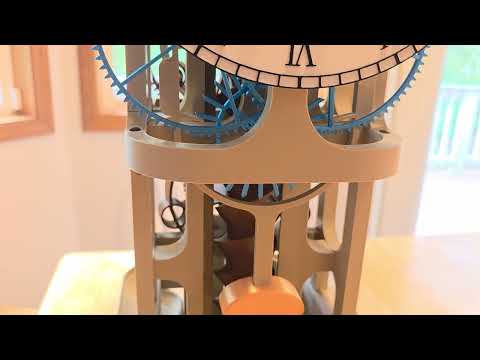
After a little more than a day, all the balls have released their potential energy to the clock and are now at the bottom. To remedy this, Steve made a long ball screw that lifts them back up to the top. Winding this clock is a noisy affair! It's a long ball screw so the balls don't even start rolling out the top till about 24 seconds into the video!
 https://youtu.be/DXnYKqPwoDg

All in all, a very fun, rewarding project. I would highly recommend it if you have any interest. Very fun, and quite cool to have running, if somewhat noisy!

Kim








