



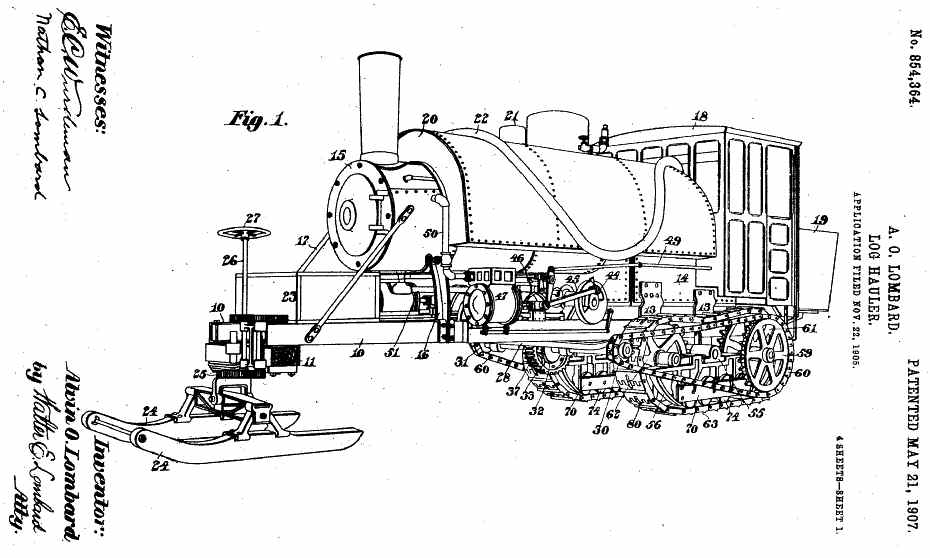

as well as a picture of one in use:

Note the steersman at the front - he could control the runners as well as an optional plow blade at the front. He could communicate via a bell rope or whistle back to the engineer in the cab. No brakes, so sometimes they had to bail out if control was lost.
The engines drove a shaft across the middle of the frame, which via chain drive ran a differential underneath

which had, on its output shaft, a pair of drive chains down to the tracks on either side

The tracks themselve look a lot like the modern tracks on a bulldozer or tank today, except that instead of the current system of sprung road wheels to support the middle of the track sections, they used a roller chain under a fixed plate

Those parts are going to be the most challenging to build - lots of interchangeable parts that need to be made. One thing going for me on this project is that there are several of these engines still running, and the Maine Forest And Logging Museum up in Bradley Maine restored theirs just a few years ago, and they have put up a TON of pictures, videos, and drawings on their website that is an absolute treasure trove of information, much more than is available for lots of old engines. They did a complete teardown and restoration of their engine, which is now in beautiful running order.
http://www.maineforestandloggingmuseum.org/lombards-in-bradley
If you go through thier site, you can see all the steps they took, with photo and video documentation along the way. A lot of the work involved students from the University of Maine, which also has lots of information. They have a lot of history of these engines, including vintage photos, and even the parts catalog from the manufacturer!
Given all that available information, I am going to make this as detailed a model as I can, though there will always be some details that need to be modified to make this a working model at a small scale. The tracks will all be made, and since the style of chain used in the drive is not available (at least that I can find) at this size, the drive and roller chains will also be made. I have found the same style of drive chain in model scales, but only in plastic, not in metal so far.
The model will be to 1" to 1' scale, which makes it approximately 30" long, 8" wide, and 10-1/2" tall. It will have a 3" diameter copper boiler, which will be a butane fired single-firetube style rather than the original coal/wood option, though I will model in the outer shell of the original style boiler's firebox, it will just have a gas burner inside it. It is a simaler scale (slightly larger) than my Shay locomotive, they should make a great pair. Unlike the Shay, since this one won't need tracks to run on (since it has its own), I can run this one out in the yard with the front runners replaced with wheels!
So, on to the build. I am going to be drawing up the parts as I go, starting from the ground up. The first part will be the track plates, of which I will need only 58 (plus a few spares). Here is a picture of what the real tracks look like,

and here is my drawing of the plate shape:

To make this many identical parts, it only makes sense to make jigs/fixtures wherever possible. For the model, the plates will be cut from 3/4" wide x 3/16" thick stainless steel. Each plate will need to be milled to proper length, then have the fingers along the sides milled in, the holes cross drilled, the ends of the fingers rounded, and finally the traction ridge in the center shaped. To do all that I have come up with a holding fixture that will let me position the parts for an operation, and put in one after another to do that one operation. It has two areas relief cut in, one to hold the part lengthwise and the other to hold it sideways. Here is the base plate of the fixture:

and then the top plate that bolts down onto it:

It has a couple of sets of holes to position it for the different operations. And here it is in action milling the first test blank to length:

Next up will be to spend some time at the big vise with the power saw and cut a boxful of the plate blanks out so I can start shaping them. Pictures to follow during that process...


 I've been looking forward to this build Chris.
